2026 Best Sterile Gloves How to Ensure They Stay Sterile?

Time:2026-10-15 Author:Henry
0%

Choosing the best sterile gloves in 2026 requires more than comparing thickness, material, or brand claims. Sterility depends on the complete journey from manufacturing to use. The World Health Organization’s Global Report on Infection Prevention and Control (2022) estimates that healthcare-associated infections affect about 7% of acute-care patients in high-income countries and 15% in low- and middle-income countries. These figures show why small handling failures deserve serious attention.

Sterile gloves can lose protection when packages become wet, torn, crushed, or opened beside an unclean surface. They may still look untouched. That is the difficult part. The U.S. FDA’s Medical Glove Guidance Manual emphasizes validated manufacturing, packaging, labeling, and quality controls for medical gloves. However, a compliant product cannot correct careless storage or rushed opening. How to ensure sterile gloves remain sterile begins with checking package integrity, expiry dates, storage conditions, and the exact procedure requirements.

Keep cartons away from sinks, heat, dust, and direct sunlight. Store them in clean, dry cabinets. Inspect each pouch before opening. A pinhole, loose seal, or moisture mark should trigger disposal, not hesitation. CDC infection-control guidance supports using sterile gloves for procedures requiring aseptic technique, while also stressing hand hygiene before donning gloves. Gloves are not a replacement for clean hands.

Details matter.

Even experienced teams make mistakes during busy shifts. A glove can brush a gown sleeve, bedrail, or packaging exterior within seconds. This guide examines material selection, barrier performance, packaging design, storage discipline, and practical opening techniques. It also asks an uncomfortable question: are current glove routines genuinely sterile, or merely familiar?
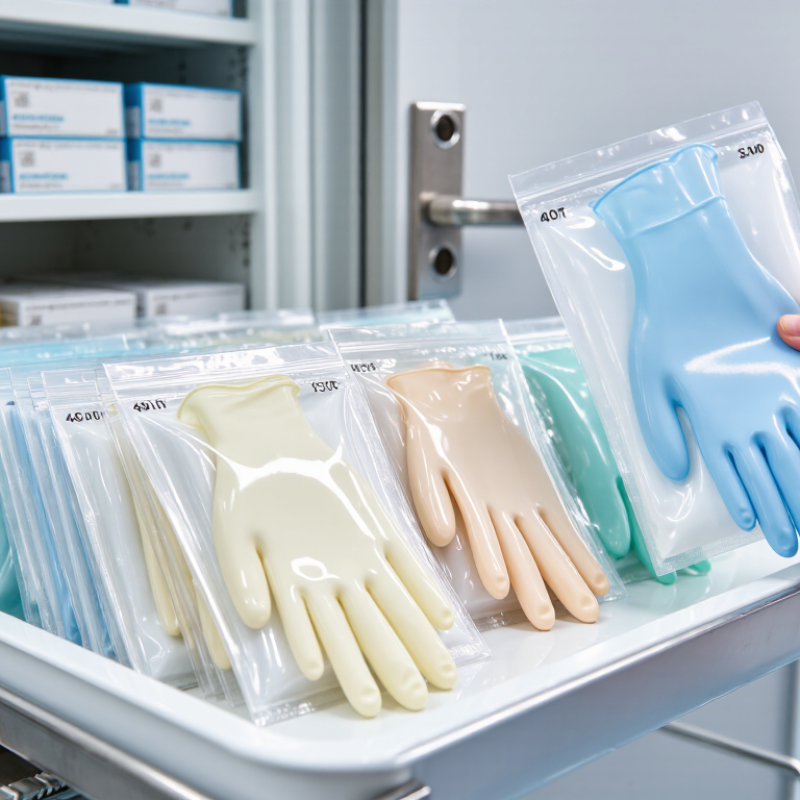
2026 Best Sterile Gloves How to Ensure They Stay Sterile?

What Makes Sterile Gloves Different from Regular Medical Gloves?

Sterile gloves are different from regular medical gloves in ways that cannot be judged by appearance. They may look identical. Sterility is not visible. Sterile gloves undergo a validated sterilization process and receive controlled packaging. Each pair is usually packed separately for aseptic procedures. Regular examination gloves are generally nonsterile. They reduce contact with contaminants but do not provide the same sterile barrier.

Packaging is critical. A sterile glove package should remain sealed, dry, and undamaged. Check the expiration date and lot information before opening it. A small tear, wet spot, or broken seal can compromise sterility. This detail is easy to overlook during a busy procedure. It should not be.

The donning technique also matters. Open the outer package away from the sterile field. Touch only the inside cuff when putting on the first glove. Use the gloved hand to handle the second glove’s folded cuff. Keep fingertips away from unsterile surfaces. If a glove touches clothing, a tray edge, or bare skin, replace it immediately. Even trained staff can make this mistake. Slow movements often protect sterility better than rushed confidence. Hand hygiene remains necessary before donning sterile gloves. Gloves are a barrier, not a substitute for clean hands. Choosing the correct size also reduces tearing and improves control during delicate work.

How Sterile Gloves Are Manufactured, Packaged, and Validated

How Sterile Gloves Are Manufactured, Packaged, and Validated

Sterile gloves begin with carefully prepared raw materials and controlled production areas. Manufacturers form the gloves on ceramic or metal molds, then wash, cure, and inspect them. This process removes residues and supports consistent strength. Workers check thickness, pinholes, surface defects, and sizing under controlled conditions. Some defects remain difficult to see. That is why visual inspection alone is not enough.

Validated sterilization follows a documented cycle. Common methods include ethylene oxide or radiation, depending on the glove material and packaging system. Each cycle requires defined parameters, monitoring, and biological or dosimetric evidence. Packaging must protect the glove after sterilization. Sealed pouches are tested for seal strength, punctures, and aging performance. Standards such as ISO 11135, ISO 11137, and ISO 11607 can guide validation work. Records should connect each batch with its materials, operators, test results, and release decision.

Tips: Store sterile glove packages in a clean, dry area away from sunlight, moisture, and sharp edges. Check the expiry date and pouch condition before use. Do not use a package with torn seals, stains, or unexpected swelling. Staff handling should be trained and observed regularly. Small handling mistakes matter. In practice, even a validated process needs review when materials, equipment, or transport conditions change. Perfect control is difficult, so honest investigation of weak points remains essential.

How to Check Sterile Glove Packaging Before Opening

Before opening sterile gloves, inspect the packaging as carefully as the gloves themselves.

Sterility depends on an intact barrier, not just a printed claim. Check the outer carton for crushed corners, tears, water stains, or signs of rough handling. Damage can hide inside.

Examine each individual pouch under good lighting. Confirm the expiration date, lot number, and sterilization information are readable.

The sealed edges should be continuous and firmly closed. Look for pinholes, lifted seals, wrinkles, moisture, or unusual discoloration. Do not open a pouch that feels damp or has lost its shape.

A sterile indicator may support verification, but it does not replace visual inspection or workplace procedures. Follow the facility’s storage and quality requirements.

Tips:

Handle pouches with clean, dry hands. Keep them away from sharp instruments and crowded drawers. Open one package at a time.

If the seal looks questionable, discard the pouch according to your facility’s procedure and select another pair. Do not try to repair damaged packaging.

I once overlooked a tiny crease near a seal during a rushed setup. It was a useful reminder: speed can weaken judgment.

Even experienced staff can miss small defects, especially under poor lighting.

When uncertain, pause and ask a trained colleague to verify the package before opening.

How to Put On Sterile Gloves Without Contamination

2026 Best Sterile Gloves: How to Ensure They Stay Sterile?

Putting on sterile gloves is a controlled procedure, not a quick hand movement. WHO reports that about 7 in 100 acute-care patients in high-income countries acquire at least one healthcare-associated infection. In low- and middle-income countries, the figure reaches 15 in 100. Glove technique cannot replace hand hygiene, but it reduces avoidable contact risks.

Check the package for tears, moisture, and a valid sterilization indicator. Remove jewelry and keep fingernails short. Perform hand hygiene, then let your hands dry completely. Touch only the inside of the first glove cuff. Lift it without touching the package or glove exterior. Slide in your hand, keeping the cuff folded. Use the gloved fingers to lift the second cuff. Never touch bare skin with the sterile glove surface. Keep both hands above waist level and away from clothing.

Tips: Work on a clean, dry surface. Move slowly. If a glove touches your sleeve, tray edge, or floor, replace it immediately. CDC guidance emphasizes hand hygiene before and after glove use, because gloves can develop small defects or become contaminated during removal. The WHO “Five Moments” framework also supports hand hygiene before a clean procedure and after exposure risk. I still underestimate how easily a cuff can brush a gown. That small mistake matters. Follow your facility’s validated procedure and document repeated contamination events for review.

Sources: WHO, Global Report on Infection Prevention and Control, 2022; CDC, Hand Hygiene in Healthcare Settings, 2024.

2026 Best Sterile Gloves How to Ensure They Stay Sterile? - How to Put On Sterile Gloves Without Contamination

Control Area What to Check Evidence-Based Requirement or Practice Common Contamination Risk Recommended Action
Glove Selection Intended use and procedure Use gloves labeled sterile for invasive procedures or situations requiring a sterile barrier. Select the correct size and material for the user and task. Using nonsterile examination gloves when a sterile field is required. Confirm the product label, sterility status, size, material, and intended use before opening the package.
Packaging Integrity Outer box, inner wrapper, and individual pouch The package should be sealed, dry, clean, and free from punctures, tears, broken seals, or evidence of moisture damage. A damaged or wet package may compromise the sterile barrier. Discard or quarantine any package with compromised packaging. Do not attempt to reseal or use it.
Expiration Control Use-by date and storage history Sterility is maintained only while the packaging remains intact and the product is within its labeled shelf life. Using expired gloves or gloves stored in unknown conditions. Apply first-expire, first-out stock rotation and check the date before opening.
Storage Environment and placement Store gloves in a clean, dry area protected from direct sunlight, excessive heat, moisture, dust, chemicals, and crushing. Compression, humidity, heat, or chemicals can damage packaging or glove material. Keep cartons off the floor and away from sinks, splashing, sharp objects, and heavy items.
Hand Preparation Hand hygiene and jewelry Perform hand hygiene before donning. Remove rings, watches, bracelets, and other items that can damage gloves or interfere with hand hygiene. Residual contamination on hands or sharp jewelry puncturing the glove. Use clean, dry hands. Allow alcohol-based hand rub or washed hands to dry completely before donning.
Opening the Package Maintaining the sterile field Open the outer package without touching the inner sterile wrapper or glove surfaces unnecessarily. Touching the inside of the wrapper, sterile glove cuffs, or nearby unclean surfaces. Place the opened inner wrapper on a clean, dry surface and keep the sterile contents within the designated sterile field.
First Glove Picking up the first glove With the bare hand, touch only the inside of the first glove cuff. Avoid contact with the outside surface of the glove. Bare fingers contacting the sterile outer glove surface. Lift the first glove by its folded cuff and insert the hand without touching the exterior.
Second Glove Picking up the second glove Use the gloved hand to touch only the outside of the second glove cuff. Keep the bare hand away from the second glove exterior. Touching the second glove with the bare hand or allowing the glove to contact clothing or unsterile surfaces. Slide the gloved fingers under the folded cuff of the second glove and pull it over the hand carefully.
Cuff Adjustment Final positioning After both gloves are on, adjust them by touching only sterile glove-to-sterile glove surfaces, unless a specific sterile technique permits otherwise. Touching skin, clothing, equipment, or unsterile packaging during adjustment. Keep hands above waist level and in view. Replace gloves immediately after a suspected contamination.
During the Procedure Glove condition and contact Gloves are a barrier, not a substitute for hand hygiene. Change gloves if torn, punctured, visibly contaminated, or when moving from a contaminated task to a clean task. Continuing to work with a damaged glove or transferring contamination between tasks. Stop safely, remove gloves, perform hand hygiene as appropriate, and don a new sterile pair.
Double Gloving Higher-risk or long procedures Double gloving can provide an additional barrier and may reduce contamination of the hands when the outer glove is breached; it does not eliminate the need for proper technique. Assuming double gloves make contamination impossible or failing to change a damaged outer glove. Follow the facility protocol and change gloves when integrity is compromised or contamination is suspected.
Removal Avoiding self-contamination Remove gloves without touching the contaminated exterior with bare skin. Perform hand hygiene immediately after removal. Touching the outside of the gloves, wrist skin, clothing, or nearby clean surfaces. Use the glove-in-glove and skin-to-skin removal technique, then dispose of gloves according to local policy.
Quality and Compliance Product standards and facility policy Verify that sterile surgical gloves meet applicable medical-device and barrier-performance requirements, such as relevant national regulations and standards including EN 455 or ASTM requirements where applicable. Choosing products without appropriate regulatory labeling, documentation, or traceability. Maintain lot information, purchasing records, staff training, and incident reporting procedures.

Key principle: Sterility depends on an intact package, correct storage, effective hand hygiene, and a technique that prevents the bare hand from touching sterile glove surfaces. Always follow the applicable healthcare facility policy and local regulatory requirements.

How to Store and Replace Sterile Gloves Safely

Sterile gloves remain sterile only while their packaging stays intact.
Store unopened boxes in a clean, dry cabinet away from sinks, windows, chemicals, and direct sunlight. Keep them off the floor. Excessive heat, moisture, or pressure can damage packaging before the expiry date. Storage is not just a shelf problem. It is a handling problem.

Use a first-expiring, first-out system and check stock during routine inspections. Examine each pouch before opening it. Look for punctures, loose seals, stains, moisture, or crushed edges. Do not use a package with questionable integrity. Check the expiration date, but do not treat it as the only safety measure. A package can fail earlier if stored poorly. This detail is easy to miss.

Open the pouch immediately before the procedure, using clean, dry hands and an aseptic technique. Replace gloves at once if they tear, become wet, touch a nonsterile surface, or contact a contaminant. Change them between tasks when contamination could transfer. Never wash, disinfect, or reuse disposable sterile gloves. Follow the facility’s procedure and the product’s instructions for use. In practice, replacement decisions are sometimes rushed, especially during busy shifts. A visible replacement schedule, nearby waste container, and regular staff checks can reduce that weakness.

FAQS

How are sterile gloves manufactured?

Manufacturers form gloves on ceramic or metal molds. They wash, cure, inspect, and size each glove under controlled conditions.

What defects are checked during production?

Inspectors check thickness, pinholes, surface flaws, and sizing. Some defects are hard to see, so visual inspection alone is insufficient.

How is sterilization validated?

A documented cycle uses defined time, temperature, and exposure conditions. Biological or dosimetric evidence supports the release decision.

Why is packaging important for sterile gloves?

Packaging protects the sterile barrier after processing. Sealed pouches are tested for seal strength, punctures, and aging performance.

What should be checked on the outer carton?

Look for crushed corners, tears, water stains, and rough-handling damage. Damage may be hidden inside.

How should an individual pouch be inspected?

Check the expiry date, lot number, and sterilization information. Seals should be continuous, firm, and free from lifted edges or pinholes.

When should a sterile glove pouch be rejected?

Reject pouches with tears, moisture, stains, swelling, unusual discoloration, or damaged seals. Do not repair questionable packaging.

How should sterile glove packages be stored and handled?

Store them in a clean, dry area away from sunlight, moisture, and sharp edges. Use clean, dry hands and open one pouch at a time.

What should staff do when packaging condition is uncertain?

Pause and ask a trained colleague to verify the pouch. Rushing can weaken judgment, even for experienced staff.

When should a validated process be reviewed?

Review it when materials, equipment, or transport conditions change. Perfect control is difficult, so weak points deserve honest investigation.

Conclusion

Sterile gloves are designed for procedures where preventing microbial contamination is essential, making them different from regular medical gloves in their validated sterility, individual packaging, and controlled manufacturing process. They are produced in clean environments, packaged to maintain barrier protection, and subjected to validated sterilization and quality checks. Before opening, inspect the package for tears, punctures, moisture, broken seals, or expired dates. Any damaged or questionable package should be replaced.

To learn How to ensure sterile gloves remain sterile, proper handling is essential. Open the package carefully, touch only the designated areas, and follow the correct sterile donning technique without allowing the gloves to contact unsterile surfaces. Store gloves in a cool, dry, clean location away from sunlight, chemicals, excessive heat, and pressure that could damage the packaging. Regularly check inventory and replace gloves that are expired, damaged, contaminated, or improperly stored. Consistent inspection, careful opening, correct application, and appropriate storage help preserve sterility until use.

Henry

Henry

Henry is a dedicated marketing professional with a profound expertise in the company's offerings. With years of experience in the industry, he possesses an impressive understanding of the market dynamics and consumer behaviors that drive success. Henry is committed to sharing his insights through......